Comical Conical Dog
You will need:
- Old dry newspapers
- Masking tape
- Wallpaper paste powder
- A cereal bowl
- Water
- Paint brush (a comfortable size to work with)
- White, cream or beige paper for the basic coat of the dog
- Scraps of coloured soft matte paper torn from the Sunday supplements for coloured patches
Beginning
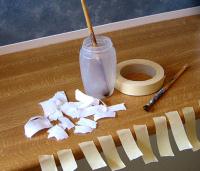
- Fig. 1
To make a basic cone shape about 5 inches high and 4 to 5 inches across the base, tear off bits of masking tape and stick the corners to the work table edge so they hang down like bits of washing on a line.They are then ready to pull off and use as you require them (fig. 1).
Take a piece of dry newspaper and scrunch it up into a ball. This will form the dome or top of the cone. Now start adding more scrunches underneath, and keep adding scrunches, gradually building up the cone shape. If you find you have dents, fill them in with tiny scrunches. Very small dents can be filled in with bits of tape. Where you’ve got bumps or bulges, press them in hard and tape them. If you get it really smooth now it will save you pasting lots of bits of paper over the dents later on. When you think your cone is ready, go away and leave it for a day and when you come back you’ll see all the dents that need filling out to make a lovely smooth cone. Make sure the bottom is really flat and doesn’t wobble.
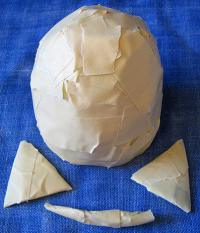
- Fig. 2
Making the ears
Take a small piece of paper, fold it into a triangle and tape it. Make another triangle and using short and long tapes, position the ears to the head (about half way across the dome). Leave a space between the ears and don’t put them too far back on the head. If you need to reposition them you just pull them off and replace them. Now, really secure them to the head using long strips to fix them on to the body so they cannot be easily pulled off. Build up the back of the ears with small scrunches and tapes so they’re thicker and solidly attached (fig. 3).
- Fig 3.
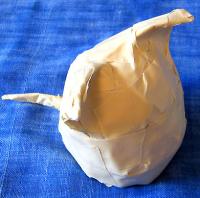
Making the tail
Take a small piece of paper and roll it into a cigarette shape. Fold it in half and twist it down it's length. This gives it strength and solidity. Tape it while it’s still twisted, using short and long bits of tape to secure well to the body. Loop the tape under and over the tail as well, filling in any dents with tiny scrunches and make it a nice smooth tail (fig. 3). Now you’re ready to decorate.