Introduction
Why a Sally Cat? Because my daughter Sally designed it. I asked her to.
I tried various methods of making it using pulp but it took a long time and was quite arduous. Never one to take an hour when a minute would do, I came up with a laminating method which has proved ideal - efficient and effective. After spending several days on the pulp methods, I found that with the laminating I could make half a dozen in a couple of hours.
The method could easily be adapted to other designs or parts of larger pieces.
You will need...
- A sheet of paper for the design.
- Paper for laminating - newspaper, yellow pages, bond, kraft etc.
- Paste (I use two thirds wallpaper paste or CMC plus one third PVA).
- Card (like the sort you get in cereal packets).
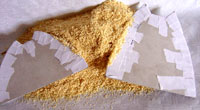
- Filling (something dry like screwed up paper or sawdust, sand or flock etc.).
Making a Sally Cat
Decide on the height and width you want your cat to be. Fold the design paper at the half-way mark, remembering that the template will need to be a bit wider than the finished cat. Draw half the outline.
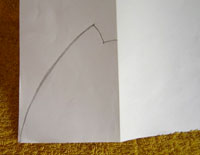
- Drawing the outline
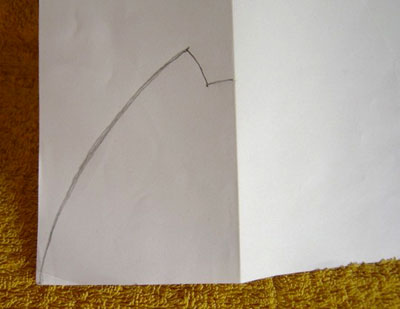
With the paper still folded, cut out the shape. This will now be symmetrical.

- Cutting out the design


- Design cutout
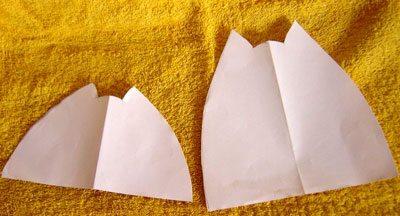
Draw the outline of the template twice on card and cut out the two pieces.
- Drawing the outline

Holding the two pieces of card carefully together in exact alignment, paste some strips over the side and top edges and leave to dry.
- Pasting
