This jaunty wall-hanging provides safe storage for all those important little odds and ends that are always going astray. Hung in the kitchen, it makes an ideal place to keep pens, pencils and markers at hand.
Step 1
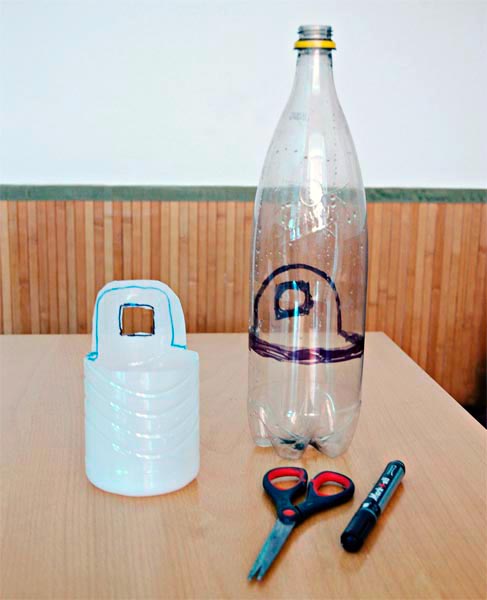
Using permanent marker, draw a line around the bottle to mark the shape of your store-to-be. Cut the plastic bottle along the marked line using a craft knife; trim and tidy the edges using scissors. Don’t forget to cut out a tiny square or round shaped hole in the centre of the bulge part of plastic as it provides the space for the nail or a hook to hang your project (once finished) on the wall.
Step 2
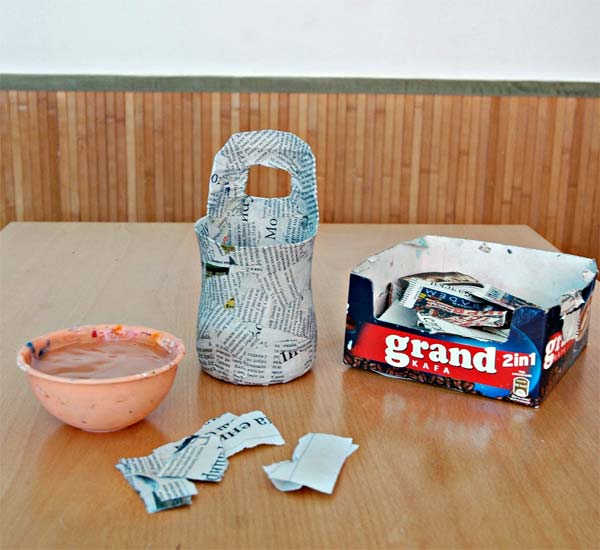
Soak strips of newspaper in either diluted PVA or flour and water paste. Apply three layers of paper mache strips all over the surface, except the space inside the bottom of the bottle (so that you can clean it if needed). Leave it in a warm place to dry.
Step 3
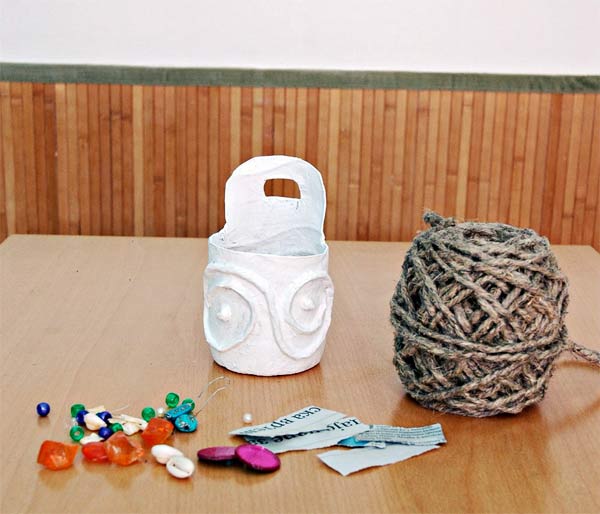
Once the surface is completely dry, it is ready for decorating. You can use various materials such as string, straight wire, feathers, jewellery fittings, pebbles, glass “globs”. I’ve created a sort of a formal pattern with string covered with tiny strips of newspaper and tiny balls of mashed paper attached to the surface. They need to dry as well.
Step 4
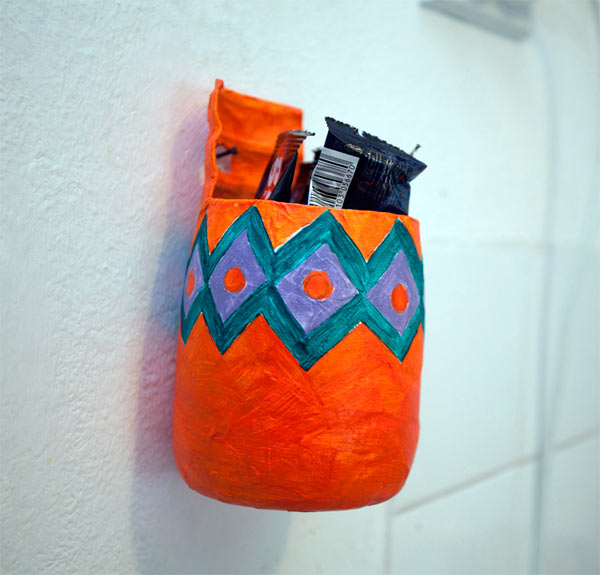
Once your creation is completely dry and you are happy with it, it is time to paint it (before that, your project needs one of two coats of white acrylic paint as a primer). I’ll leave decoration with paints up to you and the way you like it. I’ll share with you the way I coloured one of my wall stores.
The finished article
Have fun,
Branka Kordic