Coating

- Coating with paper mache
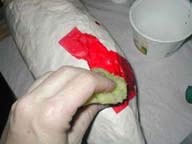
Tear and dip paper strips into the liquid starch and squeeze out the excess with your fingertips. Overlap each piece while covering the entire surface. Allow to dry and flip over to other side. Squeeze tightly after applying the first coat and repeat the process, covering any new creases. This prevents air from being trapped inside. It must be a hard shell. Make the top and the bottom extra strong for withstanding the weight of the candy. Keep in mind that it will be hanging and must be sturdy when suspended by a rope.
Finally, coat the surface with solid colored crepe paper or craft tissue by applying dry, torn pieces with a sponge dampened in the liquid starch. It must match the decorative paper which will cover it.
Allow to dry completely.
- Coating with crepe paper
- Allow to dry completely
Completion
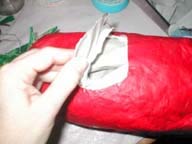
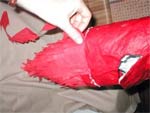
Cut a flap at the back of your form . Fold back to the outside and pull out the paper stuffing. It should be large enough into which to stick your hand. Don't worry about how it looks on the inside. Pull and tear out the paper stuffing very carefully. This will hollow out your form and allow room for candy. Next, pull a length of rope through the wire loop and secure it with a knot. Test the weight of the candy by gradually filling the cavity and suspending it. Do not overload it. It must remain firm and not sag. The flap should be bent back into place.
- Cutting a flap in the pinata
- Completion
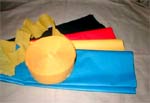
Prepare bleed resistant crepe paper or craft tissue by folding and cutting strips. Rolled crepe paper must be extended in approximately two foot lengths and folded. Craft tissue can be folded to a reasonable thickness for cutting with scissors. Make these strips approximately two inches wide.
Now, cut a narrow fringe along the bottom of the folded strips with scissors. Make sure to leave an edge for attaching the fringe.
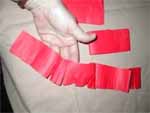
- Making the fringe
- Adding the fringe to the pinata
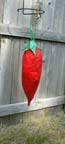
Prop the piñata on a hanging stand to decorate. Unfold each strip and apply to the piñata surface with white craft glue beginning from the bottom of your form. Go around the entire form, row by row. Make sure to overlap each row. Do not use one continuous length, as it will look like a spiral. Also, try not to lay it flat, as you want it to be fluffy.