Introduction
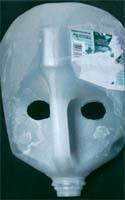
Several years or so ago my daughter gave me a Mother�s Day gift. It was her fourth-grade art project -- a mask made with recyclables including newsprint, the handle half of a gallon milk jug and remnants of yarn. Eye holes had been cut under the jug�s bottom ridge. The surface, back and front, had a thin layer of papier mache. The face was painted in vibrant, primary acrylics. Hair -- pumpkin-orange yarn -- was glued to top and sides. Although it could be worn (elastic was stapled to the back sides), I preferred to display it on a wall next to a framed, archaic map and shadow-boxed arrowheads.
I treasured that mask for years and would have it today had it not been water damaged during a move. Despite its ruin, the mask stayed in memory. In fact, it spurred my own journey into the world of papier mache.
Now a full-time, working artist, I have rendered several masks. The act speaks to some ancient memory when masks were used for healing, life passages and ecstatic transformations. Because of that there is a sense of mystery and magic when bringing a mask to life.
The technique I use is quite simple. Although I have taught mask making to six-year olds, I believe it more appropriate for children eight years and older; and for �kids� of all ages.

- The ingredients
You will need...
- A gallon-sized milk jug
- Newsprint
- Flour
- Salt
- Acrylic paints
- Found objects
- Glue
- Polyurethane (optional)
Step one: Preparation
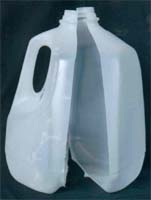
Using dependable scissors, cut the milk jug along the seam.
Eyes can be painted. Eye holes need to be cut with a utility knife (adults only).
Hint: trace eye holes with a black marker prior to cutting.

- Preparation

- More preparation...
Step two: More preparation
Shred newsprint lengthwise in two-inch strips. You can easily shred twelve-page sections. Shred at least twenty-four pages of newsprint. You may need more or less depending on the number of plies you wish to use on your mask.
Because smaller pieces of newsprint are easier to handle, shred the long pieces into fourths.
Step three: Making paste
A simple non-toxic paste can be made with unbleached flour, salt and water. You may use regular flour. However, unbleached flour works better for me because it contains more gluten than bleached flour.
Begin with one cup of flour, one teaspoon salt and two cups of lukewarm water.
Blend the salt and flour. Gradually add the water while stirring to form a smooth paste. Try to dissolve all lumps. Add enough water so you have a thin soup-like consistency.
Wallpaper paste may be used as a substitute for flour paste. I do not advise wallpaper paste when working with children, however.

