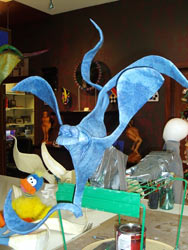
Eyes attached to body.

- Eyes attached to the body
After carving the eyes to fit onto the body, I simply tape them into place.
Creating eyelids.

- Creating the eyelids
Using heavy card stock, I've cut a couple eyelids and bent the paper into place to form goofy looking eyelids.
Creating big powty lips.

- Big powty lips
Using a marker and 2" thick foam, I sketch out the rough shape of the lips.
Carving the lips.

- Carving the lips
Using a razor knife, I carefully cut away at the foam until I get the shape I want.
Lips, eyes and eyelids attached to body.

- Lips, eyes and eyelids
Here I must be careful to use only enough professional grade masking tape to secure all the appendages to the body as most of the strength of the attachment will be multiple layers of papier mache.
A naked FisHead, ready for papier mache.

- Fins
Here is the assembled FisHead prior to papier mache, after having manipulated all the appendages into the curves and shape that I desire.
Two coats of papier mache are hand applied.
This is the most time consuming part of the piece. A fish this size takes about 10 hours of patient hand layering with incredible focus on detail for both structure and appearance. Thank God for apprentice helpers.
To get a super strong skin, I only use paper shop towels, twice the strength and stretch of paper, allowing the skin to pull tight as the air cures out of it.
After two coats of papier mache, three coats of PVA glue are applied, allowing a day in between each coat to allow for drying and shrinking. The piece is ready, after a few more days of drying, for final primer coats with gesso.


