Step Four - Adding details
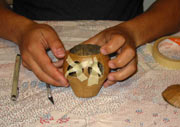
If you want to turn your skull into a bowl, you can cut a lid on top of it. Use a small glass to draw a precise circle on top of the skull.

- Making a lid
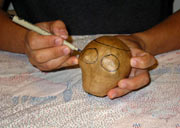
- Creating the eyse and mouth
You can also create eye sockets. Draw them with pencil first and then use a marker when you are satisfied with the shape. A nose and mouth can be created in the same way.
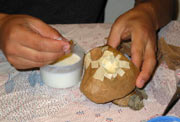
Cut following the marker lines with a sharp craft knife. At this point your skull could now be used as a lantern. You may add a handle if you wish.
Safety note: Use caution! Don't use lit candles inside papier mache figures. They are highly combustible. To use as a lantern, I recommend using a battery operated electric light, or better yet, a glow in the dark stick.

- Cutting out the features
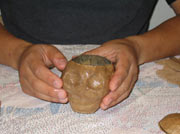
- Creating eye sockets
You may want to create recessed eye sockets instead. To do this, apply thin strips of masking tape in the shape of an "X" over each eye socket. Push the tape in with your finger to create a indentation.
Apply more tape to cover the eye sockets completely. Keep pushing with your finger to create a recessed socket.
Cover the masking tape with three layers of pasted paper. Let them dry.
- Finishing the eye sockets
- Finishing the skull
Prime the skull with gesso inside and out. Decorate as you wish with your favorite paints.