Making the back legs
Make the legs the same length as the front legs. Follow the instructions as above, but don't put a paw on the end of the leg.
Fold the top third of the leg forward and tape it. Tape a small scrunch on to the outer bend of the leg to make a 'knuckle'. This defines the bend of the leg. Build up the leg and paw area now as it will be more difficult once it's fixed in place. Flatten the short end of the leg (I just stand on it) and tape the leg carefully on to the hip so the leg is resting on the work surface. Adjust the position and tape well, making sure the 'knuckle' is showing.
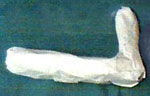
- Back leg
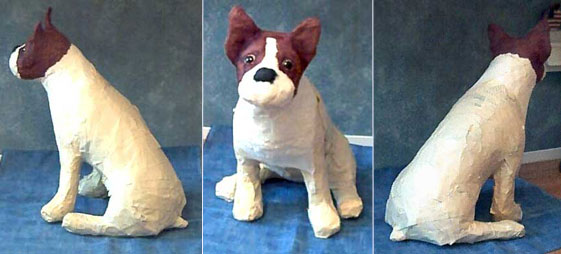
Now, using large and small scrunches and plenty of tape, fix the leg to the body. Keep looking at photographs of sitting dogs to get the pose as right as you can. I always find this the hardest part. Work at it until it looks right. Build up the back or shoulders a bit more if necessary and make a little twist for the tail and tape that securely on. You are now ready to decorate.
Decorating your dog
I use plastic craft animal eyes and have used quite large ones for this Boston. I put some white rice paper round her eyes as Bostons seem to show a lot of white around the eyeball. I left a bit of the white showing when I put the brown paper on. I may have to touch up the white with a bit of white acrylic paint at the end, as the brown paper bled a little.
I'm using Sa papers to decorate my dog but you could papiér maché with newspaper, allow it to dry thoroughly and paint it instead. When dry, paint all over with white household emulsion to seal it, then decorate with acrylic paints. Note: Make up the wallpaper paste by putting the water in the bowl first, then add a little wall paper paste powder and stir. Wait and see if it's the right consistency before adding more powder. I like the paste fairly thick, but not so thick I can't stir it around. If you add water to paste you get a nasty unworkable lump!
You could decorate with sugar/construction paper or plain tissue paper or matte coloured paper torn from magazines or newspaper supplements but the colours fade after a while if left in bright light. I do the face first. Cover the lower face with white paper then the head and ears with brown. Work up the face with white around the muzzle. The nose is small bits of black paper and while wet you can give it a gentle push in and upwards to help the squashed in look.
I'm going to put 'freckles' of brown mulberry tissue around the muzzle and work out how to do the mouth as I go along.
Cover the chest and legs in white and the back in brown or black whichever you prefer. Every time you finish with the wet papiér maché-ing, take 5 minutes to go over and over it with your hands, smoothing and blending carefully. This makes a terrific difference to the end product. Allow to dry completely. Do any necessary cosmetics. Varnish with a water based satin varnish.

- Painted
Finished Example
Below is the finished Boston Terrier. Someone pointed out that Boston Terriers are black and white so I decided to change Wag's colour.
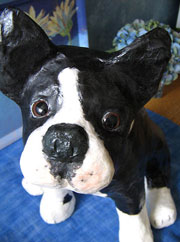
- Finished Example

- Pat Little