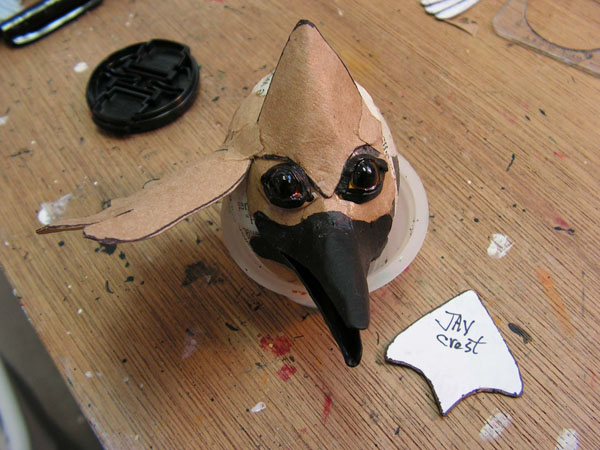
Layering Elements
Thought must be given as to which body part will overlap another when assembling your bird. In this case, the beak, crest and eyes need to be applied before any of the wing sections.
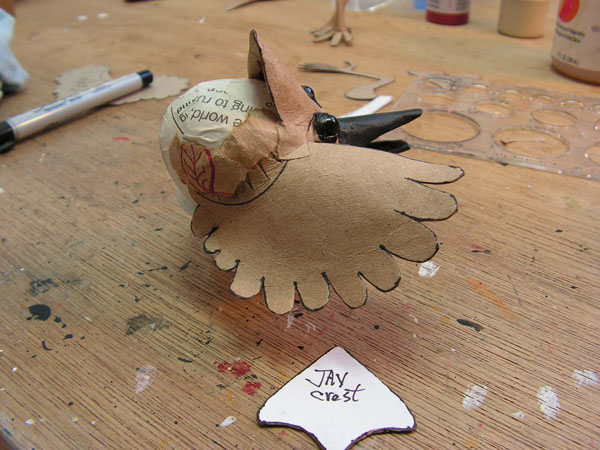
The main wing layers have been added, using the "pie" cut to ease the curves. Two tail feather layers have been added. These elements have been glued to the egg, and the joins reinforced with scraps of torn, glued paper. When the glue is dry and the parts secure, you may want to paint the crest and any other areas that may be hard to reach after further layers are added. Before painting any element, it is best to prime it with a layer of the glue/acrylic matte medium. This preserves the paper and prepares for a paint layer.
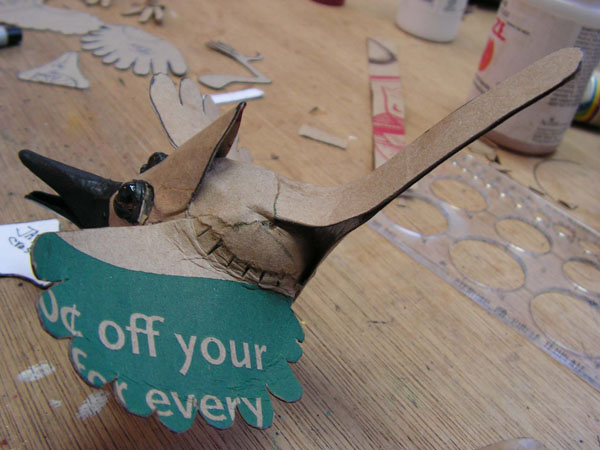
Overlapping Layers
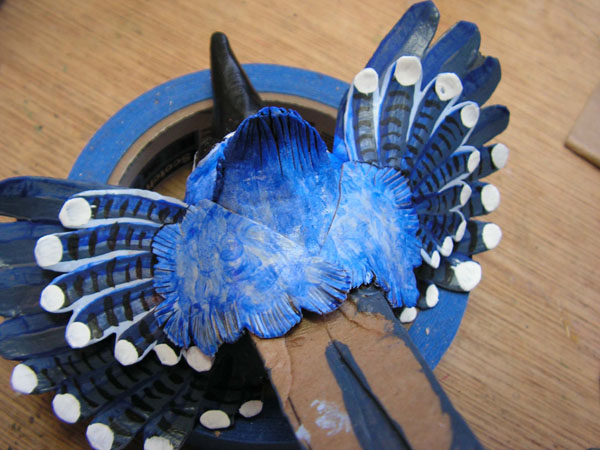
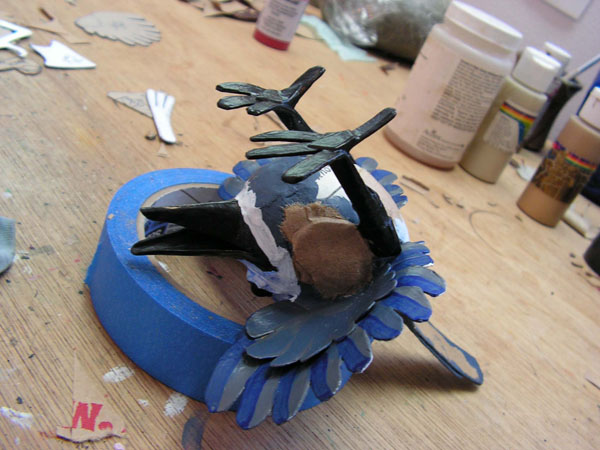
At this point layers must be formed over existing layers, so that the wet paper of each new piece can bend and mould to the shape of layers beneath. The "shoulder feather" elements (2) have been formed over the lower primary wings, allowed to dry and then painted. When dried, these two elements were held in place temporarily with removable tape so the "nape feather" element could be formed over them. Once these 3 elements are dried and painted, they can be glued in place.
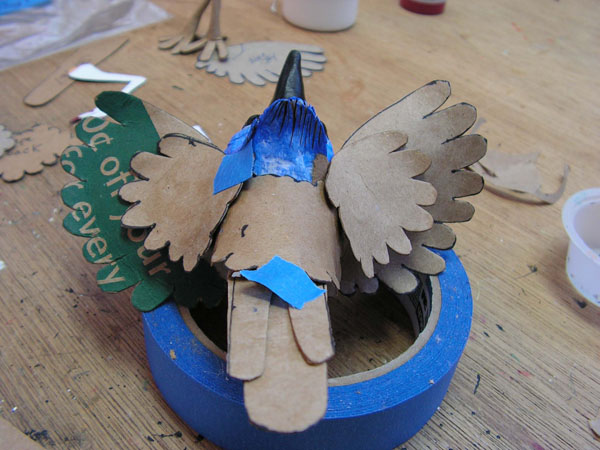
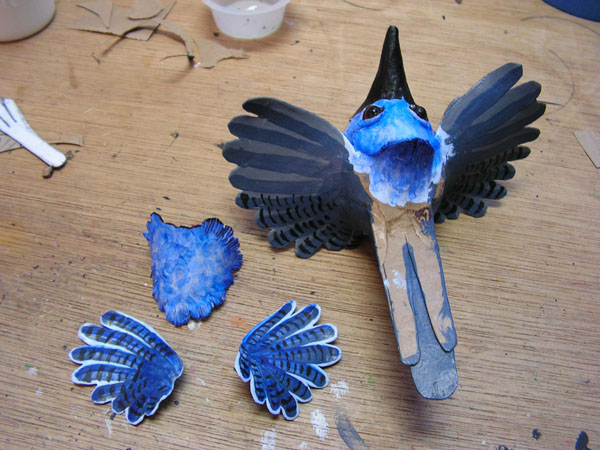
The "nape feather" element was originally one piece, but was cut into two in order to overlap both the nape area and the "shoulder feather" elements. Cuts such as this can be blended in smoothly with bits of torn, glued paper and then repainted. Note that the crest has been completed with a back section (the same pattern piece is used twice), and additional feathers added to the tail.
Legs to Stand On
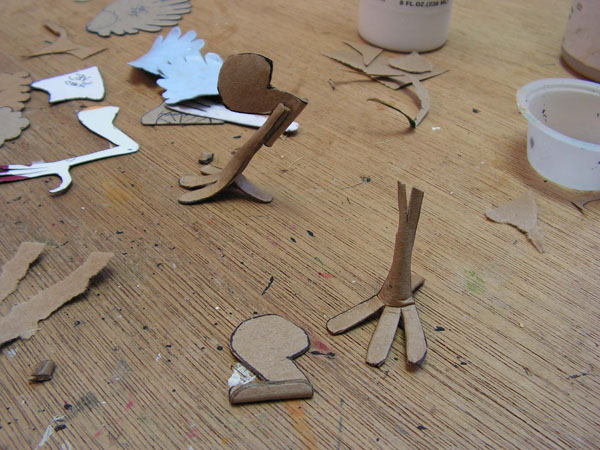
At this point, the bird is fully assembled and painted except for his feet and underside. The template for his feet is very simple; the trick is to laminate enough layers of paper that they will be strong when dry, and to carefully bend the toes in an arch while wet. (Avoid folding the toes if you want strong support!) Carefully bend the shank of the leg into a channel*. The back toe is a separate piece cut from the same thick cartonnage as the foot. It should be ½ the length as the lower leg, plus enough for a back toe.
Note: when the lower leg was formed, the shank section was carefully bent into a tight curve; this leaves a groove in which to glue the shank of the back toe.
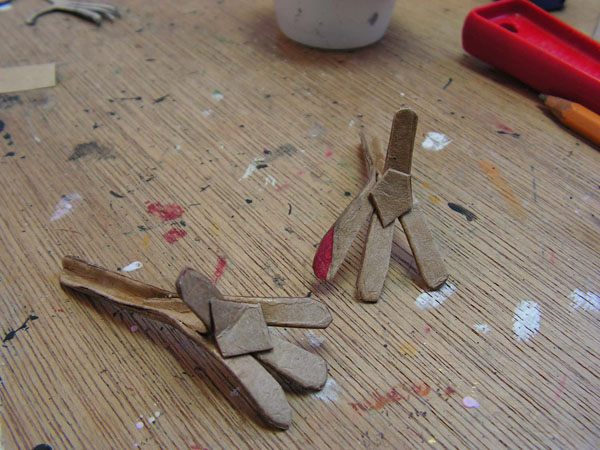
Below are a single hock section, an assembled foot, and in back, an assembled foot roughly joined to a hock section. Please note, I did not intend to crease the toe on the foot (bottom right) shown here. That was an accident, and reduces the strength of the toe. Toes should be formed like the foot at left rear; with a nice, gentle curve.
You can see the back-toe shank in the channel of the lower leg. The upper leg (hock) will be inserted in this channel to complete the leg. The diamond-shaped bit was reinforcement, to connect the back toe to the front toes and provide more strength.
The feet and leg components should be assembled and attached to the bird near the end, after the bird is fully assembled. This allows you to attach the legs in such a way as to be sure the bird can balance and not tip over. This activity is trial-and-error; I first attach the legs using a temporary adhesive, which will allow me to remove and reposition the legs as needed to get the right fit and balance before fixing them permanently.
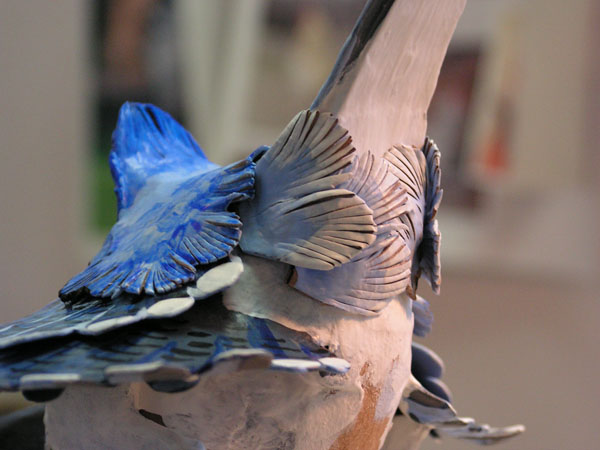
Finishing details are now added, such as neck and breast feathers. The breast feathers will overlap the areas where the legs attach, blending them in, and the lower neck feathers will overlap the breast feathers to create realistic surface.
Forming Feathers
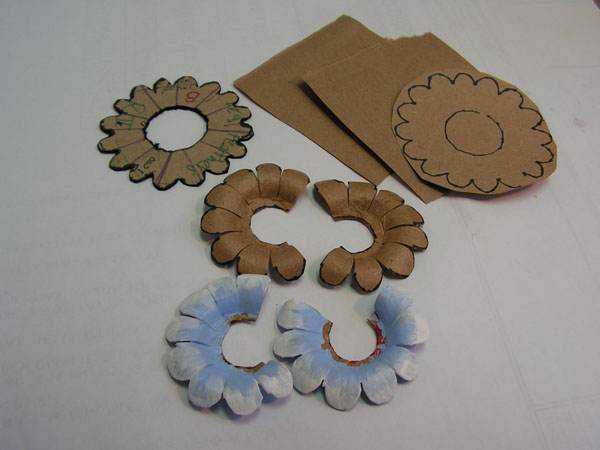
Feathers are more easily managed if you make them as a group rather than individually. The image below shows a feather template, the three layers of paper to be laminated, and the finished feather discs. Depending on your patience (or level of insanity), you can make many, many, graduated layers of feathers for a very lifelike effect. For purposes of this tutorial I only used two feather templates, one for small neck feathers and one for the breast feathers.
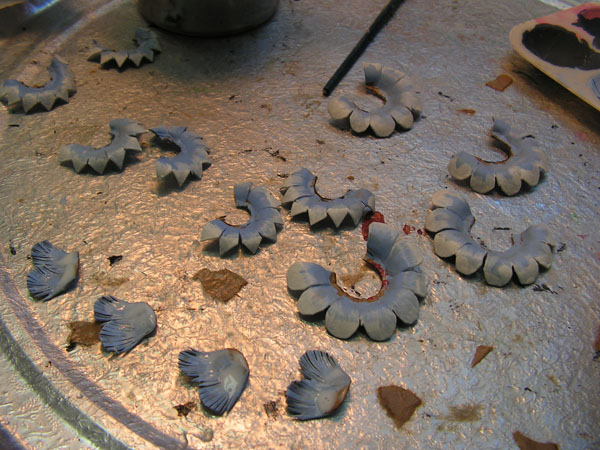
Below are finished feather discs that have been painted with several layers of acrylic craft paints and a finish coat of Modge Podge. In the forefront are a few individual feathers, which have been clipped into a fringe to more closely duplicate the texture of feathers. These too were applied in layers, overlapping like fish scales.
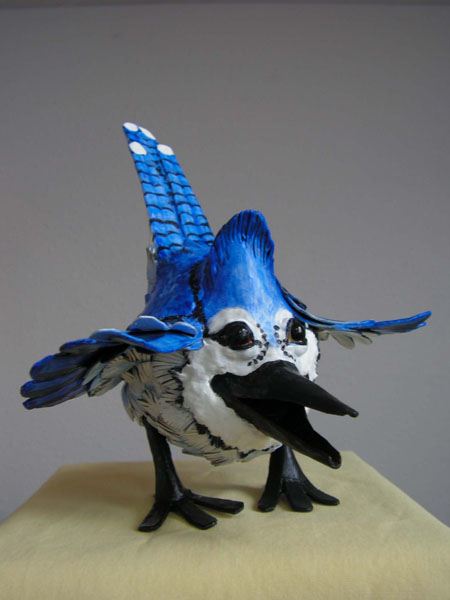
Nearly Finished!
A final paint touch-up to clean up any errors of color, a finish coat of Mod Podge (or acrylic matte medium), and “Happy Jay” is ready to fly.
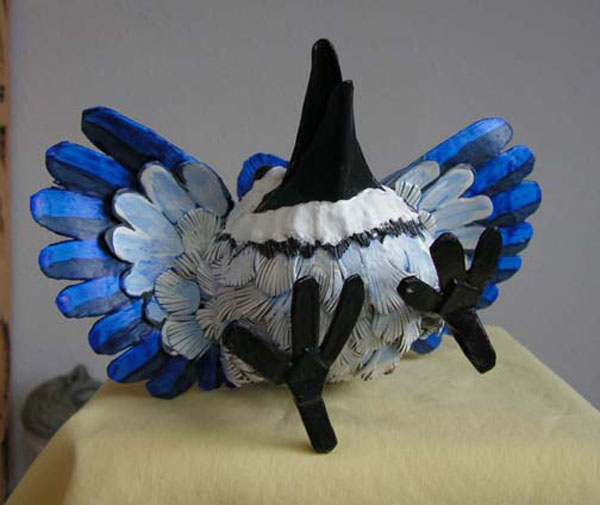
Done!
All designs and photos in this tutorial are original content, copyright 2012 [link=http://www.papiermache.co.uk/gallery/artist/318/]Priscilla (Scylla) Earls[/link].
For additional information on cartonnage, see our cartonnage article.