Using eggs.
In this article, I consider ways of preparing an egg shape for use in paper sculpture work. My preferred method is 'Sawing through' so this is the one I have illustrated.
The egg laid by birds is one of the most beautiful and satisfying shapes. It has grace of form and immense strength, bearing in mind the fragility and lightness of its raw material. The hen's egg is easily available and of a size that is reasonable to work with.
Once devoid of its contents, the shell becomes extremely fragile, so the paper worker must take steps to strengthen it. Once this is done, it regains strength and lightness that we can use to good purpose. The whole egg can weigh about 65gms. The empty, paper-laminated egg is stronger and weighs about 10gm.
Ways of removing the contents.
Blowing out.
'Blowing' an egg has been known and used for a very long time, particularly by collectors. Holding the egg upright, rub the base on fine sandpaper until a small circle of smoothed shell appears. Do the same to the other end. Using a pin or similar, pierce the shell and membrane to create a hole about 4mm at both ends. Blow hard through one end and use the pin or other suitable implement to help extricate the yolk and albumen. The hole can be enlarged if necessary.
Rinse the shell with clean water. If you want to cook the egg contents, you can, but it would not be good hygiene to serve it to others.
Apply at least two layers of paper strips to the exterior.
Breaking open.
In the course of cooking, many eggs are used and shells discarded. Provided they have broken reasonably cleanly, there is no reason why they cannot be used. It helps, before cracking, to draw a line across where the break will come. This will make alignment easier when reassembling.
Take the two halves of shell, dribble PVA (white) glue or spirit glue around the edge and carefully join them, then leave to set. When set, apply at least two layers of paper strips to the exterior.
Sawing through.
If you want to avoid an awful mess, only do this to hard boiled eggs!

- 1. Preperation

1. Prepare your paste and strips of paper in two colours at widths of about 4mm. You will also need a serrated knife.
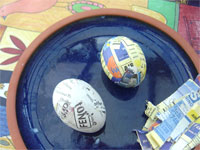
- 2. Covered hard boiled eggs
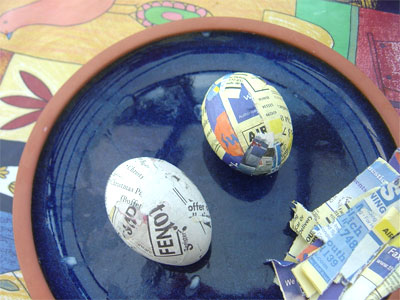
2. Hard boil the egg. When it is cool enough to handle, layer paper around it with paste both sides. Only apply a smear of paste so that the paper does not become too wet. This will stick firmly to the shell. Apply at least three layers, alternating the two colours so you can see each clearly.

- 3. Preparing to cut the eggs

3. When the layering is dry, you can prepare the egg for cutting. It helps alignment later if you mark a line at 90° to your intended saw cut.
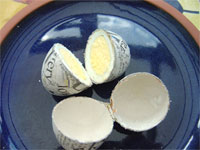
- 4. Cut eggs

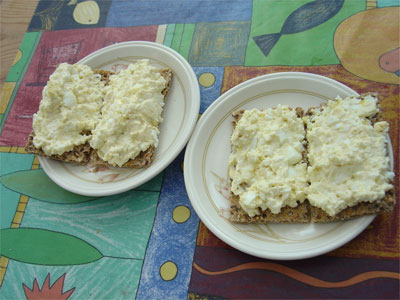
4. Saw through the egg; if possible leaving the last paper layers uncut. This will help provide a hinge to make joining easier. Wipe away any dust and remove the egg, which is perfectly edible (I love curried eggs!).

- 5. Making use of the contents!
5. The two halves of shell can then be glued together by holding them firmly in place and pasting a few strips of paper over the join. Allow these to dry then apply two layers over the whole egg to give it real strength.